
In new automation page, firstly you need to finish the trigger step settings. All fields and options in trigger setting step are mandatory, you must finish all information settings to enter next step page.
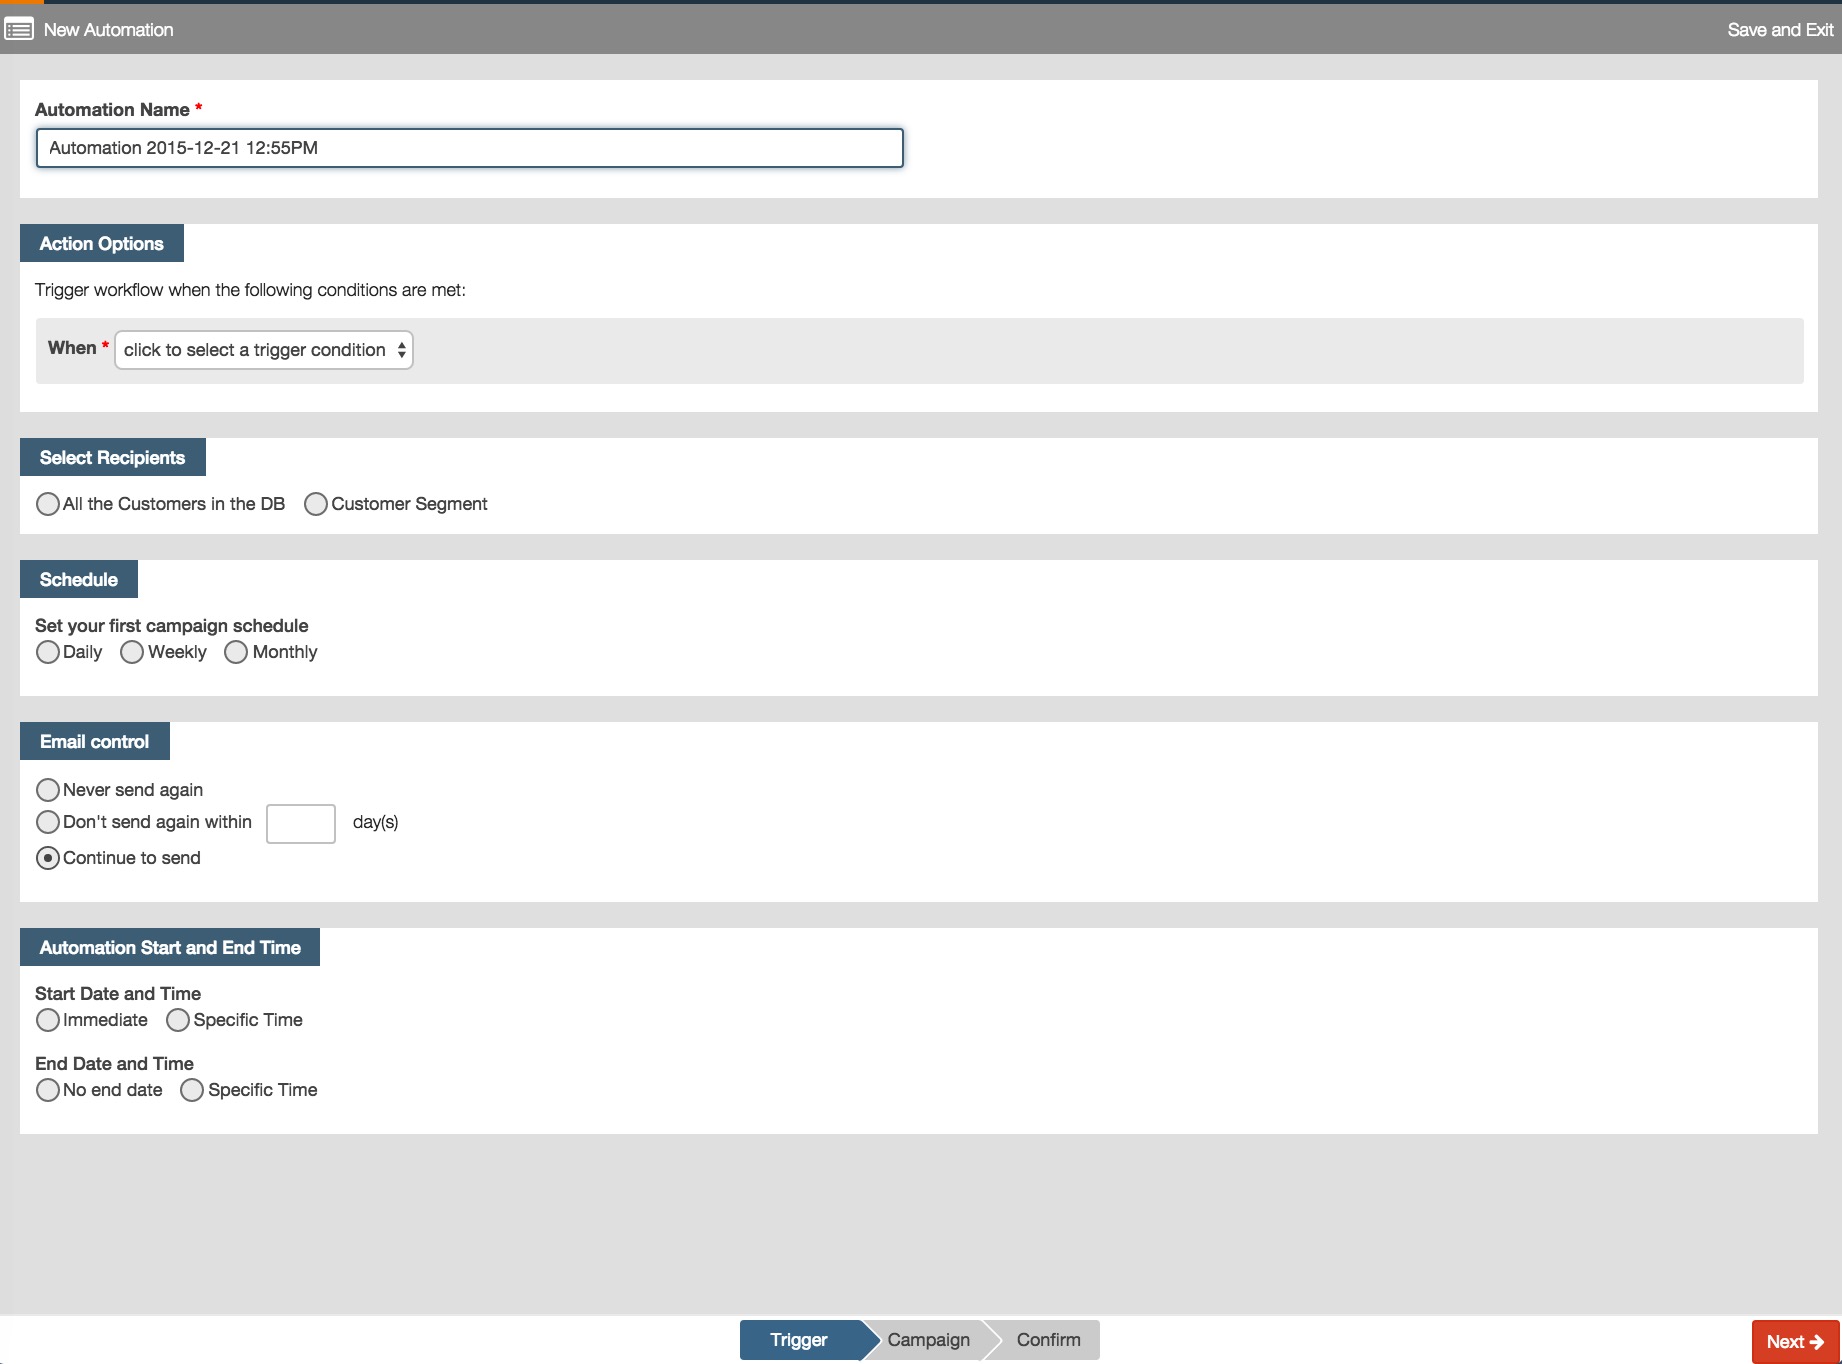
Set your automation name
RiMANGGIS will automatically generate a default automation name in the format of “Automation yyyy_mm_dd hh:mm AM”. The default name of automation indicates the automation creation time. For example, if automation is named by default as ‘Automation 2015-07-23 10:38AM’, it indicates that the automation is created at 10:38 AM, on 23th July, 2015.
You can also set your self-created automation name. You can click this field to delete the default name and input a new name.

Set your action options (trigger condition)
In trigger step page, the ‘Action Options’ is used to set trigger conditions.
Setting date property matching condition
The date property trigger condition means when the automation recipients’ date property value is matched with the trigger condition, RiMANGGIS will send the first campaign to these recipients.
You can finish your date property matching condition by the following steps:
- Click the trigger condition selection box and select the trigger condition ‘customer’s property is matched’ from drop down list.

- All date properties in your current database can be used as trigger options. Click the property field and select a property from drop down properties list.
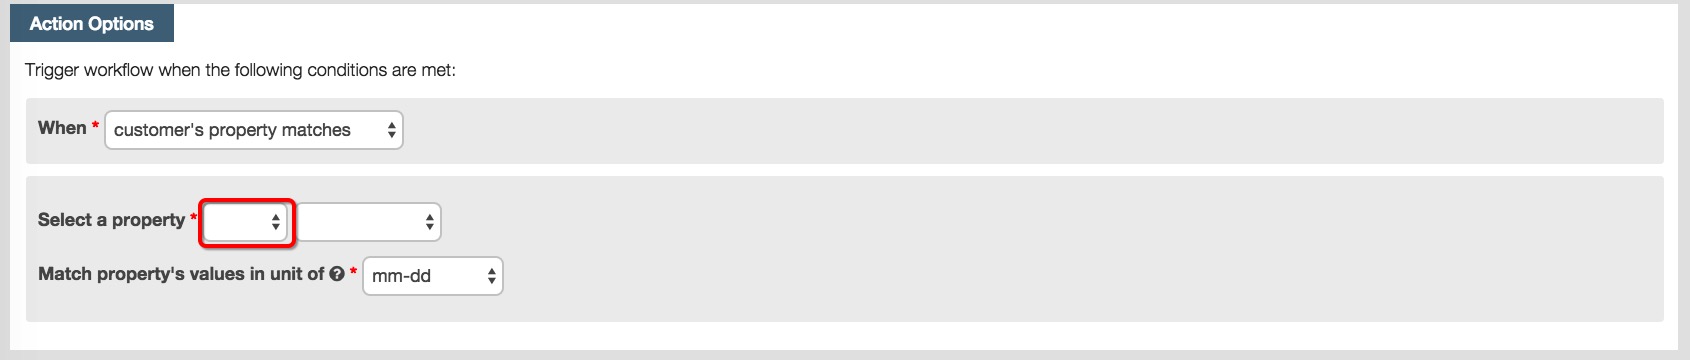
- You need to select the date matching conditions from drop down list menu. There are three options for you to choose:
1. The ‘is current day’ condition means the recipients whose birthday is on current day.
For example, current day value is 2015-07-20, and users set the matching condition as ‘Birthday property is current day’, RiMANGGIS will select recipients whose birthday are 20th July and send the first campaign to them.
2. For ‘is before’ or ‘is after’ condtion, users can input date value to specify a date range from 1 day to 999 days.For the option ‘is before x days’, the first campaign will be sent x days before current day of selected property value. For example, a user sets the matching condition as ‘birthday property is before 5 days’ and add a birthday greetings campaign into the automation, if a recipient’s birthday is on current day(assume current day is 6th May), then the recipient will receive the birthday greetings campaign on 1st May (5 days before current day).- For the option ‘is after x days’, the first campaign will be sent x days after current day of selected property value. For example, a user sets the matching condition as ‘subscription date is after 5 days’ and add a coupon campaign into the automation, if a recipient’s subscription is on current day(assume current day is 6th May), then the recipient will receive the coupon campaign on 11st May (5 days after current day). -
After setting the date property matching condition, you need to set the date matching unit by clicking this field and selecting a unit option from drop down menu. There are four options in total for you to choose:
– For the option of “yyyy-mm-dd”, RiMANGGIS will check the specified property’s value of year, month, and day.
– For the option of “mm-dd”, RiMANGGIS will check specified property’s value of month and day.
– For the option of “dd”, RiMANGGIS will check specified property’s value of day.
– For the option of “mm”, RiMANGGIS will check specified property’s value of month and send campaign to matched recipients accordign to user’s schedule.

You can move your mouse over the question icon to view the above-mentioned information of date matching unit.
Setting API data matching condition
If you want to trigger your automation flow when you edit or add a single customer in your CRM system, you can select the API data matching condtion. All customer data in your CRM system is synchronized into RiMANGGIS through API, and the data is processed with the matching of external ID.
For example:
You add a new customer with the email address, and then you call the API of automation for the trigger condtion “When API data matches”. Then RiMANGGIS will process your customer data by matching it with existing data in RiMANGGIS. If there is a customer record with the same external ID, RiMANGGIS will update your customer record in RiMANGGIS database, otherwise your customer record will be inserted into RiMANGGIS as a new customer record.
You can finish your action options setting by the following steps:
- Click the trigger condition selection box and select the trigger condition ‘API data matches’ from drop down list.

If you select API trigger condition, you don’t need to select recipients and your automation schedule is “as soon as possible” by default. When RiMANGGIS retrieves customer data that matches the trigger condition of “API data matches”, it will trigger the automation and send the first campaign to the customer as soon as possible.
Select your recipients (optional for date properties trigger condition)
You can configure segment conditions to select your recipients of the automation.
- Select ‘All the Customers in the DB’ to choose all customers in database as automation recipients.
- Select ‘Customer Segment’ to configure detailed segment conditions to choose specific customers.

Set your automation schedule
The automation schedule is used to control the campaign sending frequency. Your automation trigger condition and campaigns will be executed according to your configured automation schedule.
The schedule option is subject to the trigger conditions.
For the trigger condition of “When customer’s property is matched”, the schedule options include “daily”, “weekly” and “monthly”.
For the trigger condtion of “When API data matches”, the schedule option is “as soon as possible” by default.
You can set your schedule options for date property trigger condition by the following steps:
– Daily schedule: automation campaigns will be sent out at specific time of daily schedule.
1. Click ‘Daily’ and configure your campaign execution time.
2. Click “Execution Time” field and select the exection time option from drop down list.
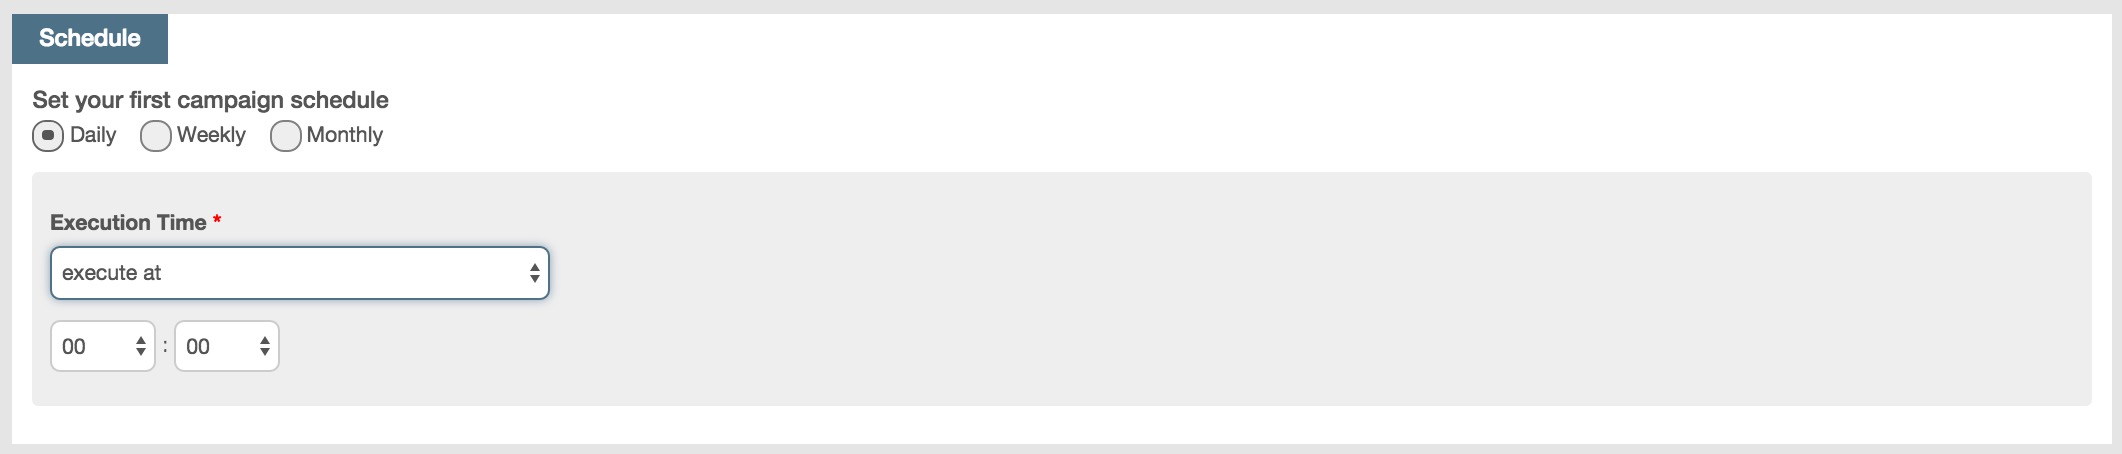
- If you only want specify the execution start time, youe can select the time option “execute at” and then configure execution start time, RiMANGGIS will start to check recipients and execute automation at your specified time.
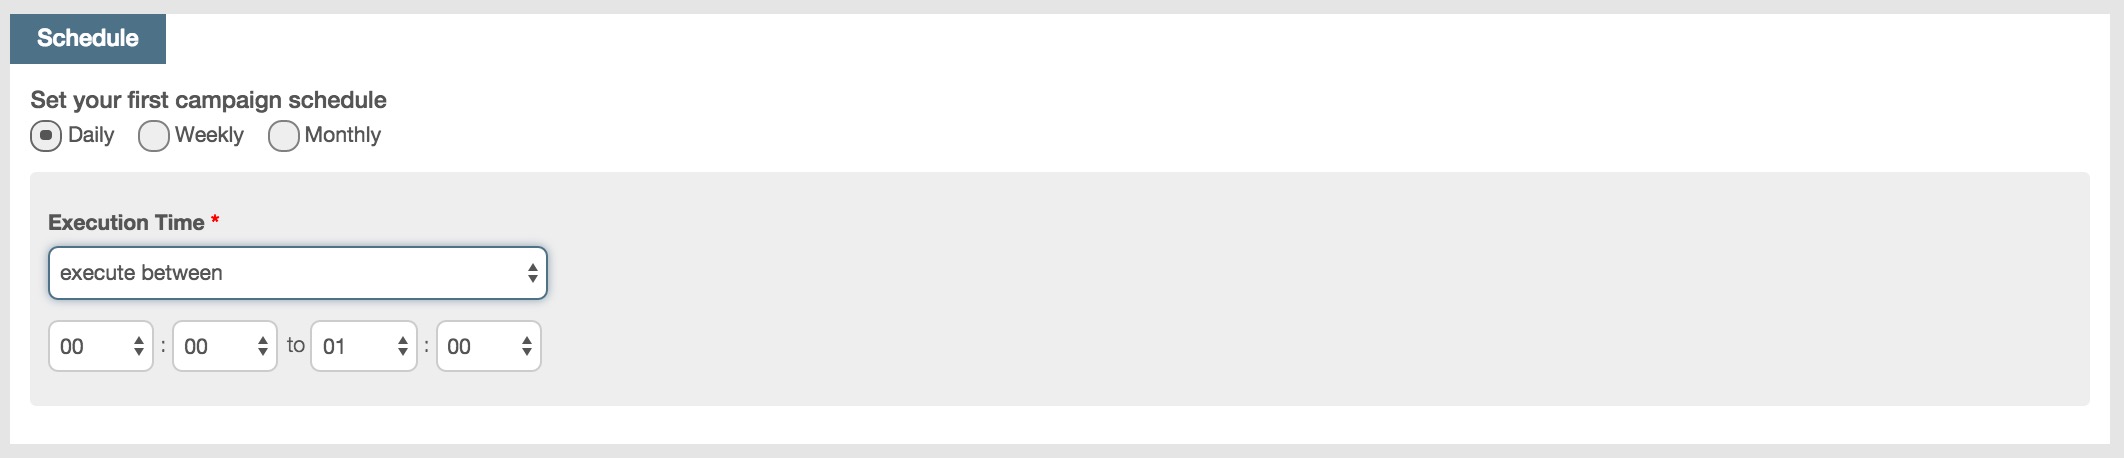
- If you want to send automation campaign at a specified time period, you can select the time option “execute between” and then configure execution start time and end time. RiMANGGIS will start to check recipients and execute automation at your specified start time and stop sending campaign at your specified end time.
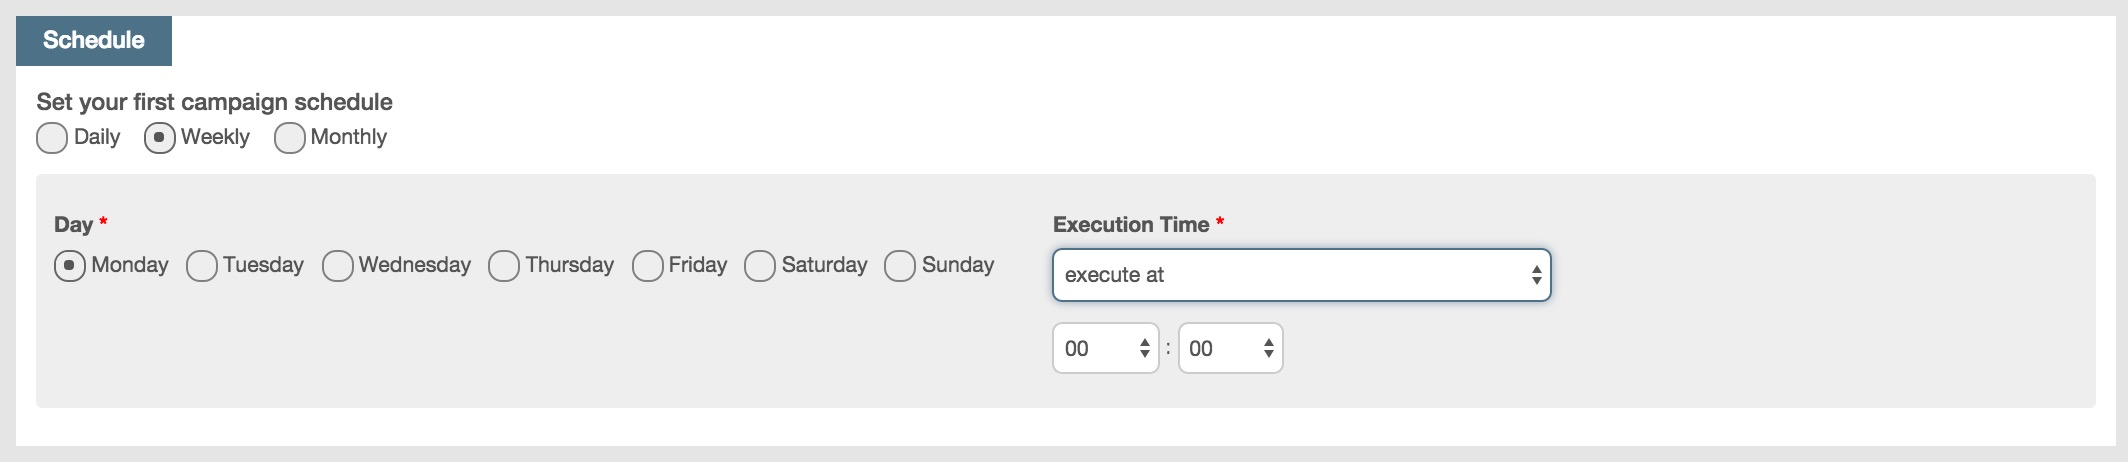
– Weekly schedule: automation campaigns will be sent out at specific time of weekly schedule.
- Click ‘Weekly’ and select a day value from drop down weekly schedule list.
- Click “Execution Time” field and select the exection time option from drop down list. You can refer to the Execution Time setting of daily schedule to set weekly execution time.
- Click ‘Monthly’ and select a date value from drop down monthly schedule list.
- Click Execution Time field and select a time value from drop down time list. You can refer to the Execution Time setting of daily schedule to set weekly execution time.
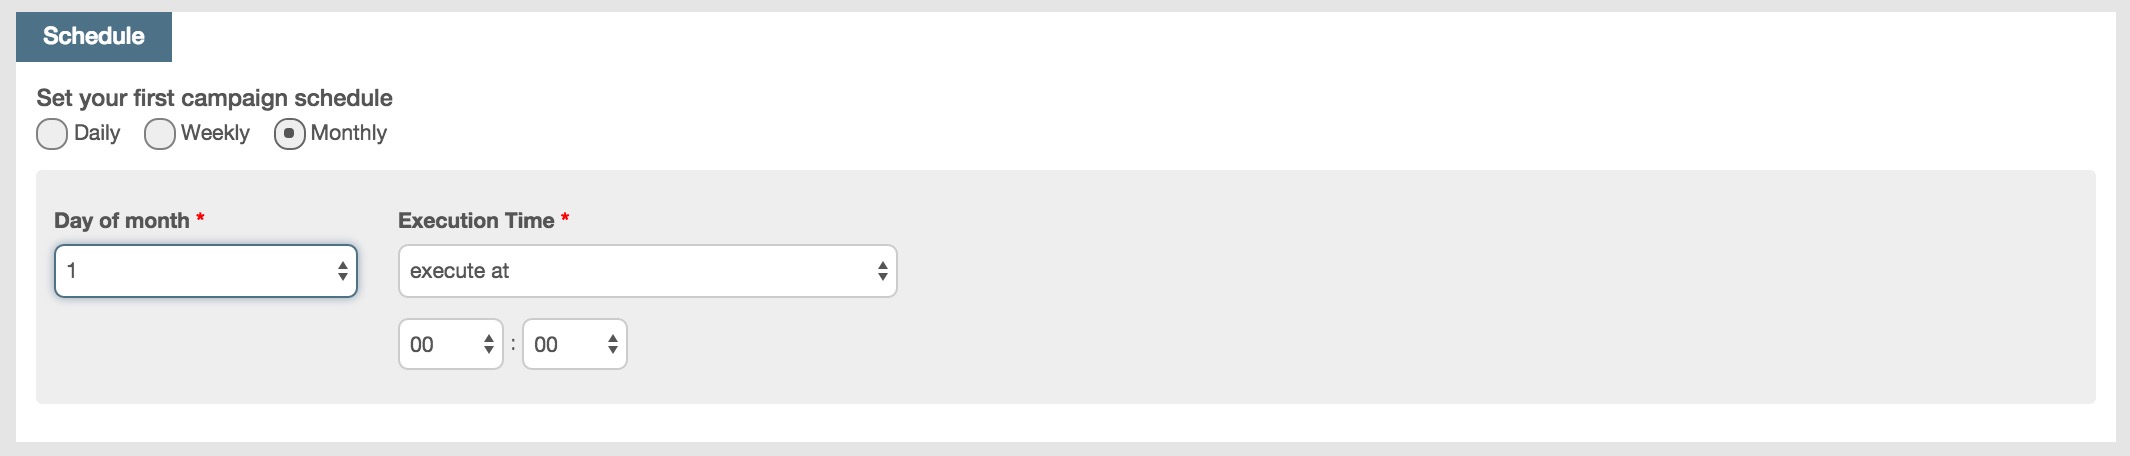 The drop down monthly schedule list includes a special date value ‘End of month’ which means the last day of month, you can specify this value if you want to execute your automation campaign on the last day per month.
– As soon as possible: If you select the trigger condition of “When API data matches”, the schedule is “as soon as possible” by default.

Set Duplication Control
Duplication Control is used to configure the campaign sending policy to the same recipient.

- Never send again: if you select this option, further options (To the same External ID/Email Address/Mobile Number) will popup. It means system will use one of the selected customer property to determine whether the automation will be triggered again to the same recipient. For example, if “Never send again + To the same External ID”, for the 2nd time the same external ID matches the trigger condition, the automation will not send anything to this External ID. If “Never send again + To the same Email Address”, even 2 different external IDs matched the trigger condition, if they are having the same email address, the later one will not receive any message.
- Don’t send within x days: This function is basically the same as “Never send again”, but you can enter an integer number to configure a time period. The logic of “Never send again” will apply in this time period. For example, If you selet “Don’t send again within 30 days + To the same External ID”, After triggering an automation to External ID “123”, even if this External ID matches trigger condition again after 20 days, he/she will not receive any message. But if he/she matches trigger condition after 31 days instead, automation will be triggered to him/her.
- Continue to send (default selected): RiMANNGIS will continue to send emails no matter recipients have received same emails before or not.
Specify automation start and end time
You need to specify your automation execution period.
Start Date and Time:
- You can configure your automation start time as ‘Immediate’, which means your automation will start to execute trigger condition to send campaigns immediately after you finish all automation steps setting and choose to start your automation.
- You can also configure a specific start time, and the automation will be executed according to your specified date and time after you finish all automation steps setting and choose to start your automation.
- If you configure your automation end time as ‘No end date’, your automation will never stop unless you manually pause it.
- You can also configure a specific end time, and the automation will stop executing trigger condtion to send a new round of campaigns according to your specified date and time.

Setting Methods:
- For ‘Immediate’ and ‘No end date’ fields, you can directly click the radio button to selection the option.
- For ‘Specific Time’:
– Date field: you can click to input date value in ‘yyyy-mm-dd’ format or directly select a date from drop down calendar list.
– Time field: click to select a time value from drop down time value list. The automation end date and time can not be earlier than automation start date and time, otherwise your configured time value will be invalid and can not be saved.
 at the right bottom corner to enter campaign step page.
